 |
|
|
|
|

|
You did WHAT on a Commodore 64?! |
|
|
|
|
Why, I did Digital Image Processing on a Commodore 64. Didn’t everybody??
No, of course, most everybody did not. The C-64 was a great game machine, but it had an 8-bit 6510 microprocessor running at 2 MHz (that’s 0.002 GHz) and it lacked the number-crunching power to do anything as compute-intensive as serious Image Processing. Yet it was the only computer I owned back then, and having graduated with an MSc in electro-optics it seemed wrong that I wouldn’t use it to recreate what I’d learned. I just had to do this...
Of course, I had another problem: I had no images to process!
This was 1986, before I even had a modem, and I had no digitized
photos in the 170KB Commodore floppy disk format. Low-cost flatbed
scanners were still in the future, as were digital cameras (in the
university I had used a “flying spot scanner”, which I actually had
to build as part of my thesis; this occupied a lab bench, cost
thousands of dollars in parts and took most of a year to construct
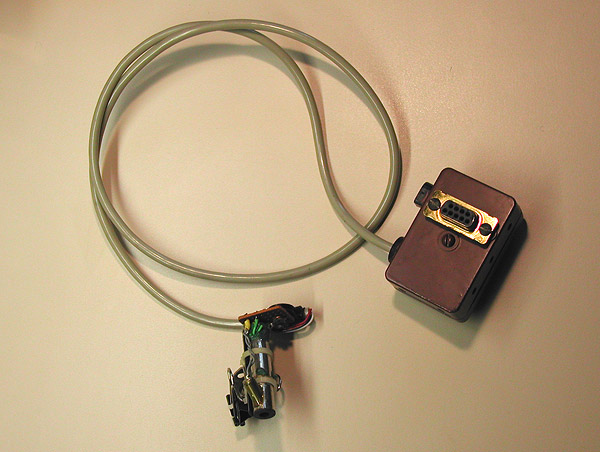
and debug). So my first challenge was to homebrew a cheap digitizer,
which would scan a photo in a raster pattern and record the gray
level at every point.
|
|
|
|
The next task was to craft the software
that would read in images from my funny scanner, store them to
floppy disk, read them back in, display them on the small TV monitor
I used, and apply to them a variety of processing operations at my
command. The problem was that the C-64 really was too slow, and its
primitive dialect of BASIC was no match for any serious programming task. It was clear I’d need
to code in assembler to get any speed out of this computer. I set
out to teach myself 6510 assembly language from a book by Jim
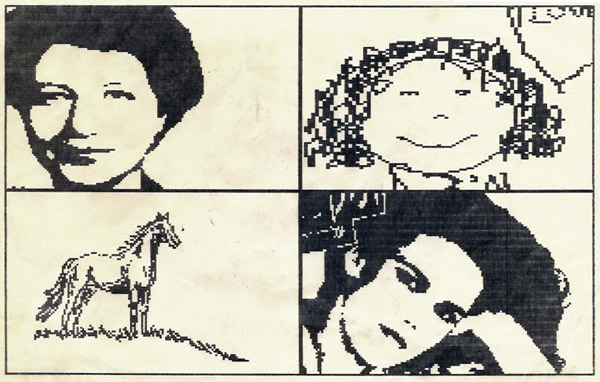
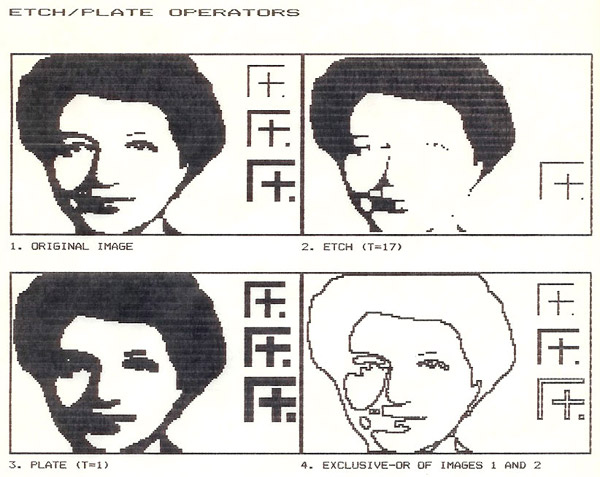
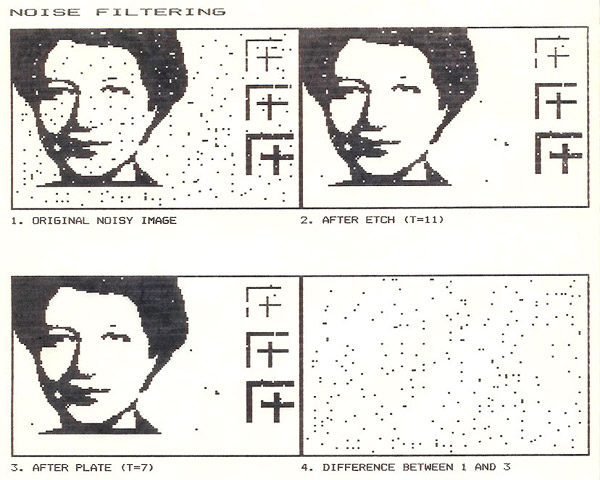
Butterfield, a leading guru in the Commodore magazines of the time. Equipped with the language, I bought MAE (a Macro Assembler and Editor package from Eastern House Software), and developed a program with the unimaginative name “G” (for Graphics). It was quite a task, generating 2000 lines of source code, 90% of it in assembler; and when it was ready I could honestly claim I was capable of processing images on a C-64. Of course there are disclaimers: the images were 320x200 pixels (all that the 64 was capable of!), and were in two levels of gray: black and white. Actually I had demonstrated the ability to process more gray levels, but in the interest of speed I reverted to B&W. And you’d be surprised at the amount of fun stuff you can do with that! “G” could scan images and mess around with them: invert them to negative, add them to each other with various Boolean operations, retouch them with a joystick, extract contiguous features, and perform user-defined 9-pixel weighted-sum transforms, allowing the construction of a great many custom operations and achieving effects like edge detection or noise removal. The photos below show some of what could be achieved. They are scanned from old printouts... alas, I had donated my C-64 to a kid in need, and these pages –- along with a stack of source printouts and an old floppy disk that may or may not be readable –- are all that I have now to show for almost a year of happy tinkering.
|
|
|
|
|
|
|
|
Home | HOC | Fractals | Miscellany | About | Contact Copyright © 2005 N. Zeldes. All rights reserved. |
|